wordpress, Author at Cheekwood - Page 14 of 45 | Page 14
x icon Close
test

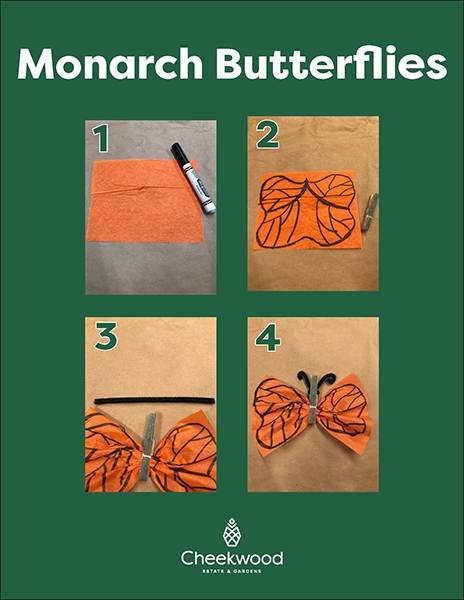
Monarch Butterflies

About the tradition: Monarch butterflies are believed to hold the spirits of the departed. Aztec tradition holds that the souls of the departed will return as hummingbirds and butterflies, and the link between myth and the monarchs’ annual return spans centuries. The first monarchs arrive in Mexico for the winter each fall around November 1, coinciding with Día de los Muertos.


Here’s what you’ll need:• Orange tissue paper

• Black markers

• Black paint

• Paint brush

• Black clothes pins

• Black pipe cleaners, cut in half


Directions:1. Paint the clothes pins black and set aside to dry.

2. Cut out a 5” x 5” square from your orange tissue paper.

3. Decorate the orange tissue paper with black marker.

4. Accordion fold your tissue paper.

5. Clip the folded tissue paper in the middle between the clothes pin.

6. Wrap pipe cleaner around the clothes pin and bend them to look like antennae.
Monarch-Butterflies
test

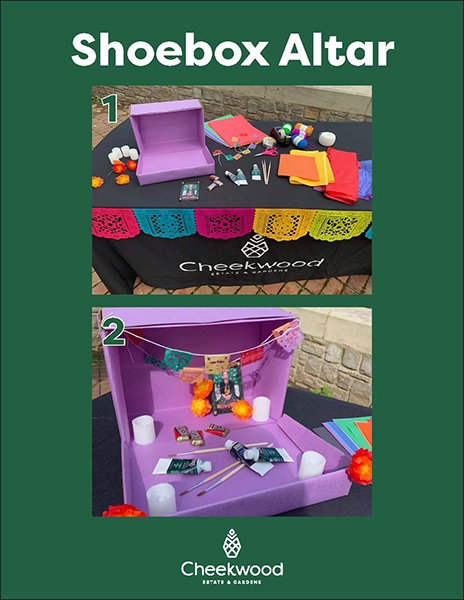
Shoebox Altar

Shoebox Altara

About the tradition: 

Families gather to build altars honoring their deceased loved ones. They fill them with photos, favorite foods and personal items of their loved ones, making each one unique. Every item placed on the altar has a special significance. Some are meant to entice and guide the spirits home, provide a safe space for them, cleanse them, and be a reminder of the wonderful experiences of life.

Learn more about El Día de los Muertos and altars from Alma Paz-Sanmiguel from Vanderbilt’s Center for Latin American Studies, and local performer Rachel Rodriguez!

Make Your Own!

Here’s what you’ll need:

• Shoebox or other small box

• Clear tape/double sided tape

• Glue

• Scissors

• Pictures of loved ones

• Personal items of loved ones honoring

• Battery operated tea lights

• Real or fake marigolds

• Mini foods

• Wrapping paper/construction paper for covering shoebox

• Tissue paper

• Scissors

• String/yarn

• Sugar skulls


Directions:

1. If your box has flaps, cut the flaps off. They can be used to add levels in your box. You can also leave them to extend your altar.

2. Wrap your box in colorful paper.

3. Add the pictures of who the altar is for inside the box.

4. Decorate by adding in the personal items of the people you are honoring. We used Frida Kahlo in our altar so we are adding in paint brushes and paint as personal items. You can add in favorite foods, clothing, or other items that belonged to or represent the person your altar is for.

5. Finish your altar by adding in additional items such as sugar skulls, tea lights, marigolds, and any other decoration.

Shoebox-Altar
test

La Catrina Puppets

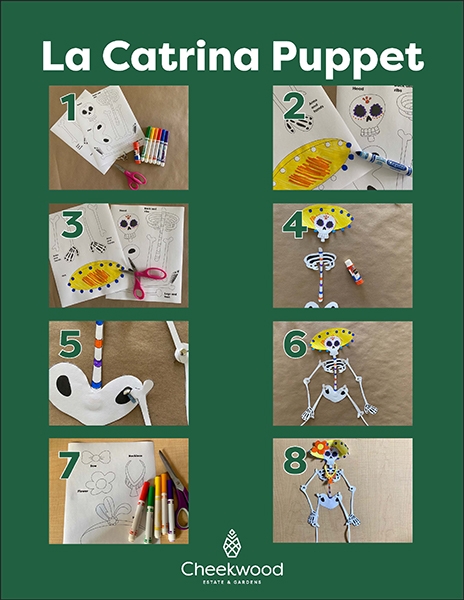
La Catrina Puppets

About the tradition: La Catrina first appeared with her fancy hat and clothes as we know her today in the early 1900s because of an artist named José Guadalupe Posada. Today, La Catrina is the most recognizable symbol of El Día de los Muertos.


Here’s what you’ll need:• Catrina template
*See template below

• White cardstock

• Scissors

• Markers, crayons or colored pencils

• Glue or brads


La Catrina Template  


Directions:1. Print the Catrina template on cardstock and cut it out.

2. Arrange the pieces into a skeleton.

3. Attach the pieces together. You can glue the pieces together or use brads at the joints so the arms and legs can move.

4. Decorate your Catrina!

La-Catrina-Puppet-1
test

Tots! Activity: Calaveras Masks

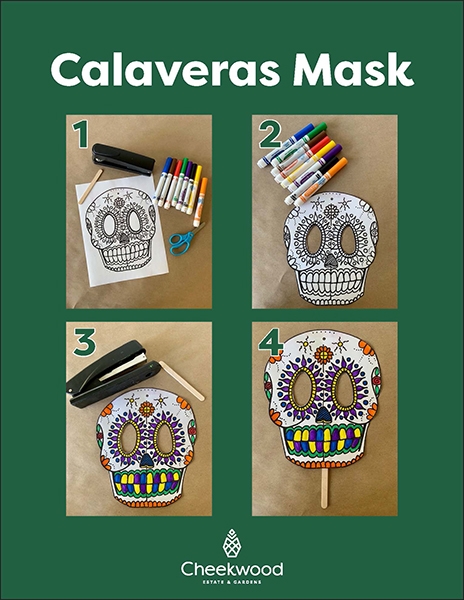
Tots! Activity: Calaveras Masks

About the tradition: Calavera, meaning “skull” in Spanish, are typically placed on altars usually in the form of sugar skulls. The calavera has become one of the most recognizable symbols of the Day of the Dead. They are a sign of remembrance.


Here’s what you’ll need:• Mask template
*See template below

• Cardstock

• Markers

• Popsicle sticks

• Staples


Mask Template  


Directions:1. Print the mask template on cardstock cut it out, including the eyes.

2. Color in the mask with marker.

3. Staple your mask to the popsicle stick so you can hold it in front of your face.


Try pairing the activity with one of these books:
The Day of the Dead by Bob Barner

Día de los Muertos by Roseanne Greenfield Thong

Funny Bones: Posada and His Day of the Dead Calaveras by Duncan Tonatiuh

Uncle Monarch and the Day of the Dead by Judy Goldman

Frida Kahlo and Her Animalitos by Monica Brown

Calaveras-Mask
test

Turner Seasons Garden

Turner Seasons Garden

In celebration of Cheekwood’s 60th anniversary as a public institution, we’re highlighting one of our 12 distinct gardens each month to showcase our wide variety of garden offerings. With 55 acres of rolling hills and 12 intricate, unique gardens, there’s something for everyone to experience and love at Cheekwood.

Designed by internationally renowned landscape architect Michael Van Valkenburgh, the Turner Seasons Garden formally opened on June 6, 1999. It is named after Laura Katherine Turner, the wife of CEO Cal Turner Sr., who along with his father founded Dollar General Stores.

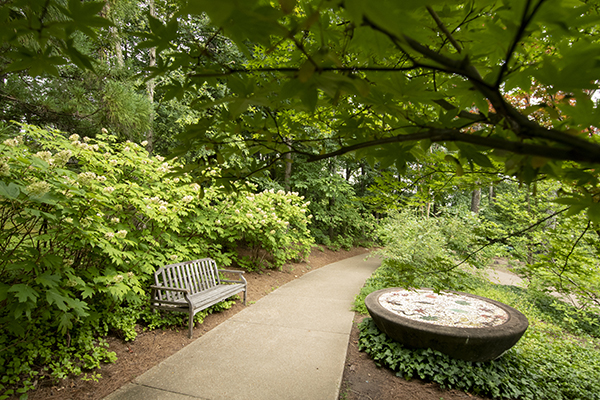
The Turner Seasons Garden cascades down the hill and is divided into four garden “rooms”, making a wonderful use of a steep slope. It is separated into four terraces, each highlighting the four different seasons. The seasons are expressed in several ways: through the plants, the art of the mosaic rain basins, and in poetry displayed on the basins and garden plaques. Each of the four garden sections contains a rain basin depicting the season and length of day at that time of year.

The basins were made by the Martha’s Vineyard, Massachusetts artist, Jenifer Strachan. They address the phenomena of seasonality in response to the rotation of the earth on its axis and the resulting variations of darkness and light, as well as changes in precipitation. The basins are cast from stone and display an abstract diagram of the cardinal points as they occur on the site and relate to the sun’s rays. Around the rim of each basin, poetic lines by writer and stonemason, John Maloney, also of Martha’s Vineyard, are engraved.

In the spring of 1998, in order to incorporate more poetry in the garden, Mr. Turner sponsored a local poetry competition for students of Metro Davidson County Schools. A winner was chosen for each of the four gardens. and the winning poems were engraved on four-inch-thick plaques.

©Caitlin Harris Photography
Turner-Seasons-Garden

A walkway near the top passes under four rose arbors displaying old fashioned roses, one of Laura’s favorite plants. The layout of the garden responds to the dynamic nature of seasonality. Because seasons are the result of constant change in the biological world, the four garden areas were formed in interlocking triangles. The garden at the highest elevation is the spring garden, followed by winter, then fall, and finally summer.

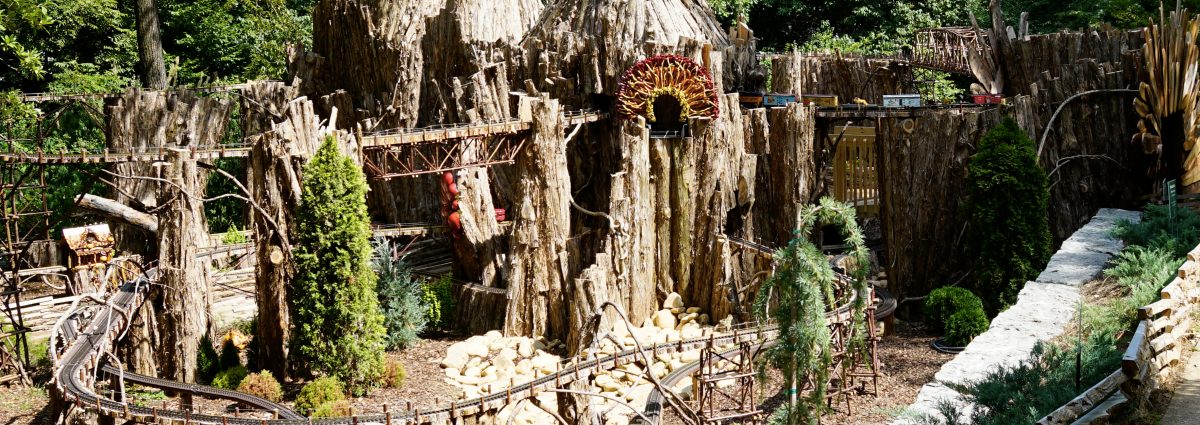
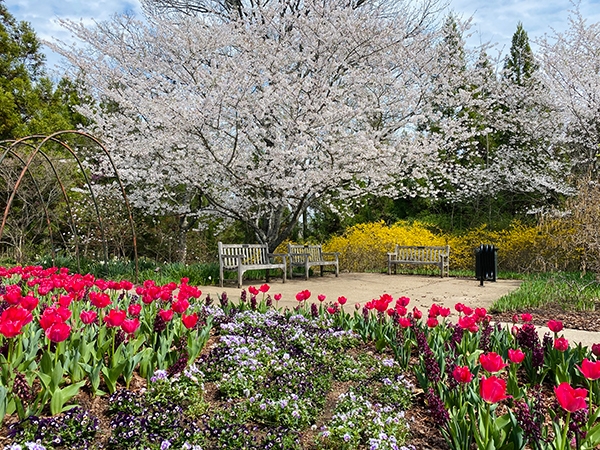
The garden sections move back and forth along the hillside, organically positioned along the path. The garden room corresponding to the current season is awakened with botanical interest. In spring, guests encounter a blanket of daffodils growing beneath spring blooming magnolias, redbuds and fragrant viburnums. Summer brings vibrant color with the help of herbaceous perennials such fragrant, silver lavender, hybrid bi-tone peony, purple groundcover verbena and tangerine geum, ornamenting the TRAINS! display that is popular with children and families. Autumn is highlighted with the ambers, golds, and reds of Japanese maple and oakleaf hydrangea. In the winter months, visitors can appreciate the bare bones of the Turner Seasons Garden, sitting upon an evergreen carpet of Lenten rose, blooming ivories and pinks, and bright red possumhaw berries providing food for the abundant wildlife passing through.

On September 17, 2019, in partnership with the Governor’s Books from Birth Foundation, Cheekwood launched a Storybook Trail, depicting the classic children’s story, The Little Engine that Could. Installed along the pathway leading to Cheekwood’s popular TRAINS! display, this permanent exhibit combines exercise and learning into a fun family activity.

Be sure to stop by the Turner Seasons Garden, located across from our Visitors Center, during your next visit to Cheekwood.

Click here to read about our other distinct gardens. For a look at what’s currently blooming in the gardens, check out our Gardeners’ Top Picks here.

test

Tots! Activity: Squirrel Puppets

Tots! Activity: Squirrel Puppets

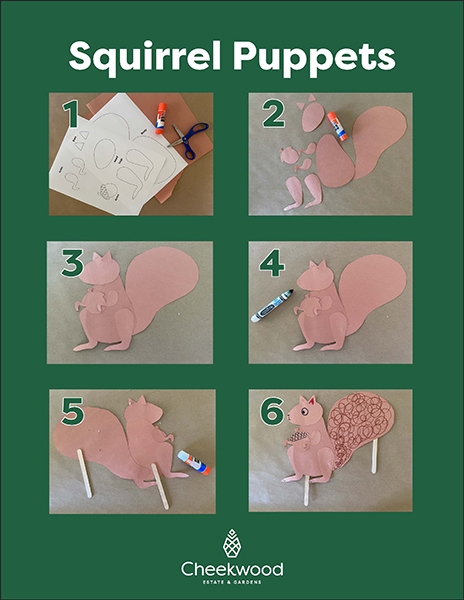
As Cheekwood’s Tots program is temporarily suspended, we are sharing today’s activity for parents and tots to activate at home. Use our files to create your own squirrel puppets, then share your work with us by tagging @cheekwood on Instagram and using #cheekwoodtots!

Here’s what you’ll need:• Squirrel template *See template below
• Brown construction paper

• Scissors

• Glue

• Popsicle stick

• Markers

• Wiggle eyes


Squirrel Template


Directions:1. Print the template onto brown paper.

2. Glue the pieces together to make a squirrel.

3. Add eyes and other finishing touches.

4. Glue squirrel onto the stick to finish your puppet.


Try pairing the activity with one of these books:
Because of an Acorn by Lola M. Schaefer

The Busy Little Squirrel by Nancy Tafuri

Little Acorn by IglooBooks


Ask your explorer: • Why do squirrels hide acorns? Do you think they remember where they are?

• What do acorns turn into?

• Do you see squirrels all the time? What do they do as it gets colder?

Squirrel-Puppets
test

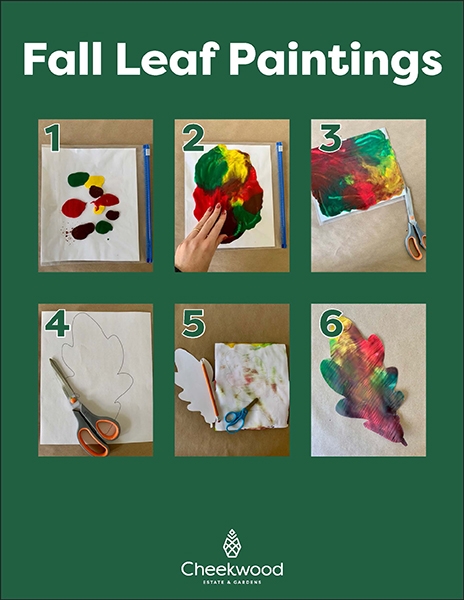
Tots! Activity: Fall Leaf Paintings

Tots! Activity: Fall Leaf Paintings

As Cheekwood’s Tots program is temporarily suspended, we are sharing today’s activity for parents and tots to activate at home. Use our files to create your own fall leaf paintings, then share your work with us by tagging @cheekwood on Instagram and using #cheekwoodtots!

Here’s what you’ll need:• Leaf template *See template below
• Large Zip top plastic bag

• White cardstock

• Paint in red, orange, yellow, brown, green

• Scissors

• Pencil


Maple Leaf Template  Oak Leaf Template  


Directions:1. Place the white cardstock paper in the large zip top bag.

2. Squeeze paint onto the white paper in the bag and seal it tight.

3. Squish the paint around with your fingers to cover the whole piece of paper.

4. Remove the painted paper from the bag and set aside to dry. You can cut the bag open if needed to help remove the paper.

5. While the painting dries, print out the leaf template and cut it out.

6. Once the paper is dry, trace the leaf on the back of the painting and cut the leaf out.

7. Optional: Create several leaves, hole punch them and hang on string to create a fall leaf garland.


Try pairing the activity with one of these books:
Fletcher and the Falling leaves by Julia Rawlinson

Goodbye Summer, Hello Autumn by Kenard Pak

Leaves by David Ezra Stein


Ask your explorer: • What happens to leaves in the fall? What colors do they turn?

• How do trees look different now than they did in the summer?

• What did we do to the paint to make a colorful leaf?

Fall-Leaf-Painting
Privacy Policy Sitemap Web design by Speak
Back to top