wordpress, Author at Cheekwood - Page 13 of 45 | Page 13
x icon Close
test

10 Fun Facts About Our Resident Reindeer

10 Fun Facts About Our Resident Reindeer

Publish Date: 11/19/2020

The holiday season is a magical time here at Cheekwood, from one mile of lights to TRAINS! lit up for the holidays, there’s something for everyone to enjoy! In addition to the lights and festive decor, one of our most beloved holiday traditions is our resident reindeer, Hope and Dolly.reindeer

In their sixth year at Cheekwood, the reindeer continue to charm visitors from near and far. This year, we are lucky to have Dolly returning for her second year with us, and we are thrilled to introduce our newest resident reindeer, Hope.


While the reindeer are regulars at Cheekwood, they are fairly uncommon in the state of Tennessee. We asked Hall Whitaker, Cheekwood reindeer keeper extraordinaire, to tell us some fun facts about these amazing animals that you probably didn’t know.

  1. Reindeer can live to be about 16 years old! Dolly is only a year old, but is already sporting her own set of antlers.
  2. There are 14 subspecies of reindeer. Many countries have reindeer as an indigenous species, but sometimes they are known by different names. In Canada they are known as caribou, which means “snow shoveler.”
  3. Reindeer are the only species of deer that the female grows antlers just like the males. Their antlers get bigger every year, but full grown male antlers are typically larger than those of the females.
  4. Every year, both male and female reindeer lose their antlers and grow a whole new set. Males lose their antlers after mating season, which is around October or November, while female reindeer keep their antlers much reindeerlonger. Females usually don’t lose their antlers until January or February, and pregnant females can keep theirs even longer!
  5. Reindeer have a double coat that protects them from arctic conditions. Their outer coat sheds water, while their inner coat keeps them warm.
  6. Similar to other types of deer species, reindeer are crepuscular. This means they are most active at dawn and dusk.
  7. Unlike other species of deer, reindeer have shorter tails and ears as well as fur covered noses. This helps prevent frostbite in their natural habitats.
  8. Reindeer are quite the athletes! They can run at speeds of up to 50 mph. Usually, they prefer a slower pace as they migrate, covering anywhere from 500 – 3000 miles in a year depending on species and food availability.
  9. They are also excellent swimmers, the best of any of the deer species. They average about 4 mph but can get up to 7 mph if needed. Part of the reason is that their outer coat has hollow hair shafts which trap air and make them buoyant. They wear their own life preserver!
  10. Reindeer are the only mammals that can see ultraviolet light! This allows them to detect urine of their predators in the snow.

Learn more about Hope and Dolly and see them for yourself during regular daytime hours and at night during Holiday LIGHTS.

For more information about Cheekwood’s Holiday LIGHTS, visit our Holiday LIGHTS calendar page here.

test

Tots! Activity: Autumn Silhouettes

Tots! Activity: Autumn Silhouettes

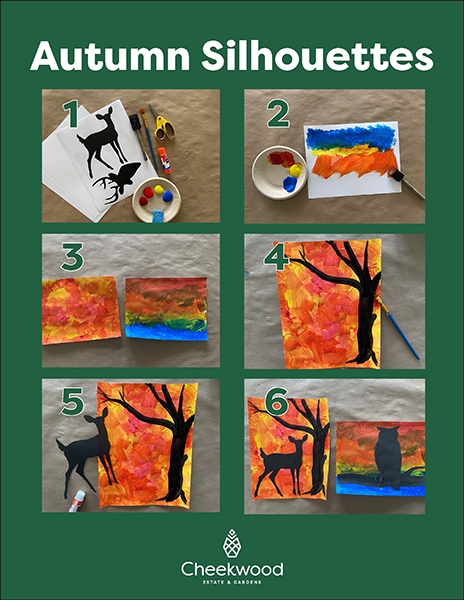
As Cheekwood’s Tots program is temporarily suspended, we are sharing today’s activity for parents and tots to activate at home. Use our files to create your own autumn silhouettes, then share your work with us by tagging @cheekwood on Instagram and using #cheekwoodtots!

Here’s what you’ll need:• Painting paper or thick paper

• Autumn colored paints

• Silhouette templates

• Scissors

• Glue

• Sponges and paint brushes


Directions:1. Paint your paper with the fall colors (red, yellow, orange, brown).

2. Wait for your painting to dry.

3. Print and cut out the silhouettes.

4. Glue the silhouette onto your dry painting.

5. You can also paint your own silhouettes using black paint on the dried paintings.


Try pairing the activity with one of these books:
Mouse’s First Fall by Lauren Thompson

Autumn is Here! by Heidi Pross Gray

Flashlight by Lizi Boyd

Lawrence in the Fall by Matthew Farina


Ask your explorer: • What colors did you use? Why do you think they are fall colors?

• What is your silhouette of? How did you make it?

• What happens to the leaves on the trees in the Autumn?

Autumn-Silhouettes
test

Howe Garden

Howe Garden

In celebration of Cheekwood’s 60th anniversary as a public institution, we’re highlighting one of our 12 distinct gardens each month to showcase our wide variety of garden offerings. With 55 acres of rolling hills and 12 intricate, unique gardens, there’s something for everyone to experience and love at Cheekwood.

In the winter of 1968, the Howe Garden was the first modern garden to be developed at Cheekwood, decades after the original landscape was installed on the estate. With the introduction of the Howe Garden, the scope of Cheekwood was expanded and enriched, most notably with the addition of a native wildflower collection. The installation of quality horticultural display as such marked yet another milestone in Cheekwood’s history- initiating Huldah Cheek and Walter Sharp’s mandate of developing a world-class botanical garden.

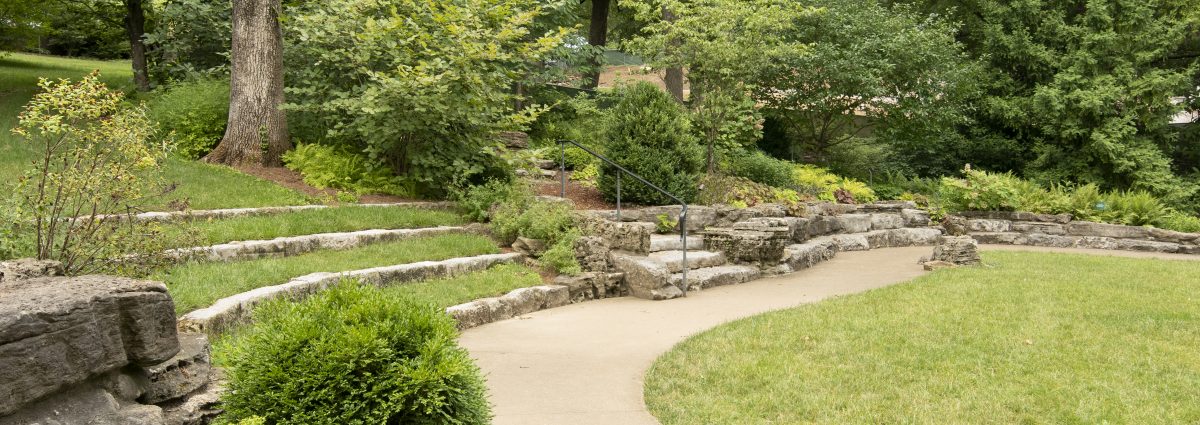
In the early 1900s, Cora and her husband, Harry Howe, moved from New England to Nashville and purchased an eight-acre parcel of land in East Nashville, selected for its century-old oak trees and rich, rock-free soil. In 1922, Mrs. Howe began planting the garden that she would eventually name “Wildings”, growing many native wildflowers, ferns, azaleas, and dogwoods. Cora officially opened her garden to the public in 1929, coincidentally, the same year ground broke for the Cheekwood estate. It is considered by many to be the first public garden in Nashville, entertaining thousands of visitors each spring when the wildflowers were most abundant.

53779449_10157432259499739_1607604094229282816_n
2019June_Cheekwood_Summer_DSC2006

Mr. Harry Howe passed away in 1966 and, sadly, Mrs. Howe followed just one year later. The estate was willed to Mr. Howe’s secretary, Rena Sullivan, and Cora’s nurse/companion, Ethel Wright. The two women were unable to afford the yearly maintenance necessary for the estate’s upkeep and the property was eventually sold. Members of The Garden Club of Nashville, of which Mrs. Howe was a founding member and long-time treasurer, approached Cheekwood as a potential new home for the Howe Garden. With a tremendous amount of fundraising and negotiation, a plan was enacted to devote a portion of the Cheekwood estate to be a living tribute to Cora Howe, showcasing her love of wildflowers and garden visitors.

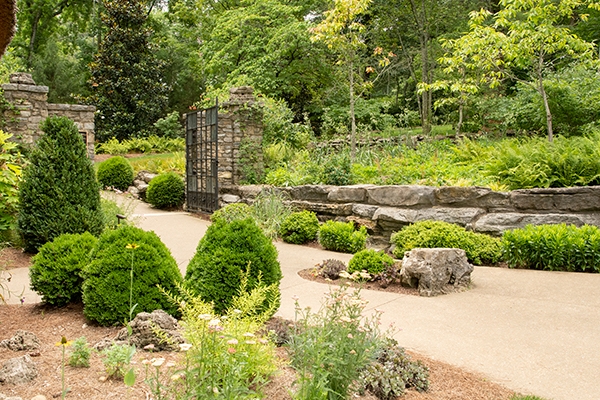
Over a three-week period in December of 1968 that included some extremely frigid, snowy weather and late nights, the relocation of the Howe Garden took place. Charles Ellis of Ellis Tree Care, Elvin Cantrell, Cora’s head gardener for many years, and close friend, Mrs. Graham, directed a team to move plants, soil, a stone wall, several garden ornaments, and even the tool shed from East Nashville to Cheekwood.

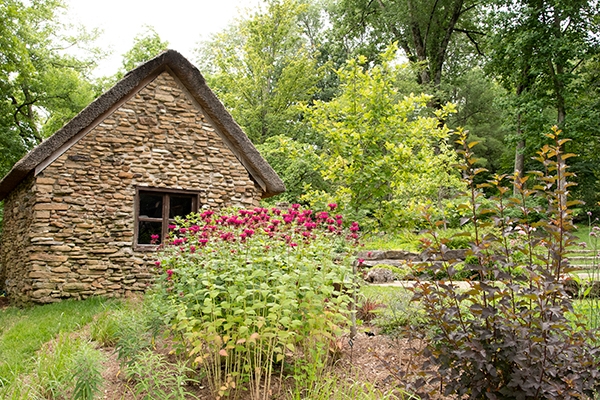
The thatched roof did not make the trip to Cheekwood in 1968 and was replaced with a shingle roof. For the renovation that occurred in 2012, Cheekwood had only two options for the specialized and ancient craft of roof-thatching in the United States. Scotsman Colin McGhee of McGhee & Co., based in Virginia, was contracted. Using the traditional reed, McGhee constructed the tidy and water-tight, steep-pitched roof at a 45-degree angle. The overall process took about 3 weeks to complete. Colin McGhee’s beautiful, signature thatched roof is a favorite topic among Cheekwood guests and staff alike.

Today the original spirit, told though the Mrs. Howe’s beloved garden remains; its cherished story much enhanced. With its position as the first garden installation at Cheekwood, the Howe Garden now has a rich historical significance. The year 2011 marked an important fundraising effort by the Garden Club of Nashville, the largest in Cheekwood’s history at the time, which allowed for a comprehensive renovation designed by Page / Duke Architects in 2012. Fifteen new trees including redbud, black tupelo, sourwood, and four different species of magnolia were added to the already abundant collection of native species. Oakleaf hydrangeas, native azaleas and winterberry shrubs now provide a soft foundation and a strong example of Southern flora. Reimagining the garden’s role as a destination and gathering space with distinct focal points resulted in the multidimensional story that guests experience today.

In the spring of 2019, the Garden Club of Nashville hosted a special 50th anniversary celebration of the Howe Garden, offering tours and family activities for visitors, and serving Mrs. Howe’s signature snack, lemonade and gingersnaps.

2019June_Cheekwood_Summer_DSC2004-1

Be sure to visit the Howe Garden during your next visit to Cheekwood and enjoy this unique and tranquil part of Cheekwood’s estate.

Click here to read about our other distinct gardens. For a look at what’s currently blooming in the gardens, check out our Gardeners’ Top Picks here.

test

Tots! Activity: Feathered Friends

Tots! Activity: Feathered Friends

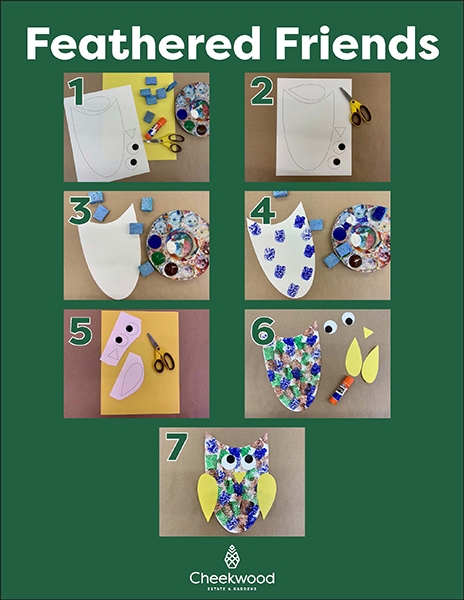
As Cheekwood’s Tots program is temporarily suspended, we are sharing today’s activity for parents and tots to activate at home. Use our files to create your own feathered friend, then share your work with us by tagging @cheekwood on Instagram and using #cheekwoodtots!

Here’s what you’ll need:• Owl parts template *See template below
• Cardstock

• Yellow construction paper

• Scissors

• Paint in various colors

• Sponges for painting

• Glue stick


Owl Template


Directions:1. Print out the owl parts template onto cardstock and cut out the pieces.

2. Trace the beak and two wings onto construction paper and cut out. Use the cardstock template body and eyes.

3. Dip your sponge into the paint and stamp it all over the owl’s body. Set aside and let dry. Optional: Try using a celery stalk instead of a sponge to create a more feathered look!

4. Once your owl is dry, assemble it by gluing the parts together.


Try pairing the activity with one of these books:
Little Owl’s Day by Divya Srinivasan

Owl Moon by Jane Yolen

The Barn Owls by Tony Johnston


Ask your explorer: • What do feathers do for birds?

• What kind of home do owls and other birds live in? How do they make their nests?

• Have you ever seen or heard an owl? What time of day was it?

Feathered-Friends
test

Tots! Activity: Woodland Creatures

Tots! Activity: Woodland Creatures

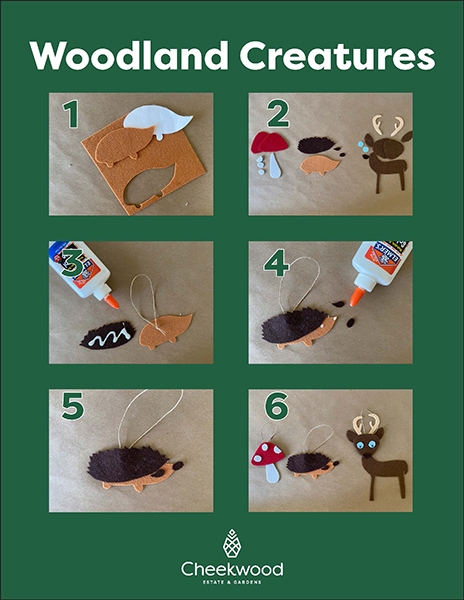
As Cheekwood’s Tots program is temporarily suspended, we are sharing today’s activity for parents and tots to activate at home. Use our files to create your own woodland creatures, then share your work with us by tagging @cheekwood on Instagram and using #cheekwoodtots!

Here’s what you’ll need:• Animal template *See template below
• Brown construction paper

• Felt

• String

• Glue

• Markers or other craft materials


Animal Template


Directions:1. Print the template out. Cut out the pieces and trace them onto felt.

2. Draw the face and details or use other craft materials.

3. Knot the string.

4. Glue the felt pieces together, sandwiching the knotted string between the front and back pieces.


Try pairing the activity with one of these books:
A Walk in the Forest by Maria Dek

Forest Has A Song: Poems by Amy Ludwig VanDerwater

The Busy Tree by Jennifer Ward


Ask your explorer: • What kind of animals live in the woods? Which one is your favorite?

• What shapes did you use to make your animals? What parts did those shapes become?

• How did you make your woodland animals?

Woodland-Creatures
test

Gardeners’ Top Picks November 2020

Gardeners’ Top Picks November 2020

Fall is the perfect time to check out all the color in the gardens! Check out our garden team’s top plant picks for November. Use this as your guide as you explore the grounds!

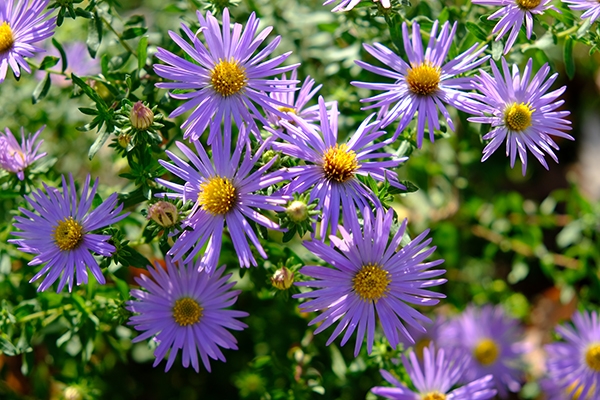
Aster (Aster oblongifolius ‘Raydon’s Favorite’)

Bloom Time: October – November

Sun Requirement: Full sun

Water Requirement: Dry – Medium

Wildlife: Bees & Butterflies

Tolerates: Deer & Rabbits

Native to North America: Yes

Other: Wonderful selection for late season color; plant in masses for best effect

Zones: 3 – 8

Location: Howe Garden & Bracken Foundation Children’s Garden

Aster-oblongifolius-Raydons-Favorite-2-1

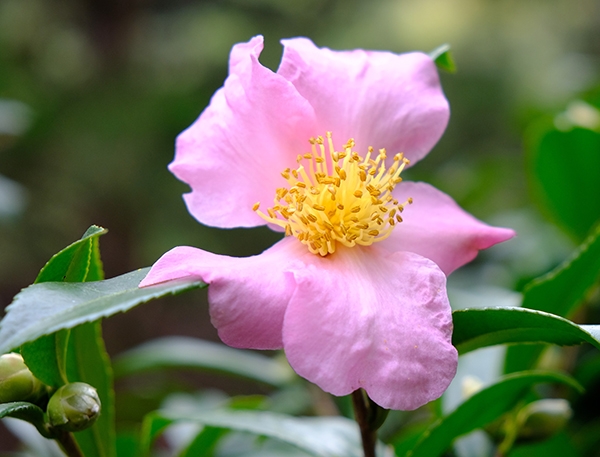
Camellia (Camellia ‘Winter’s Star’)

Bloom Time: October – December

Sun Requirement: Part shade – full shade

Water Requirement: Medium

Wildlife: Bees

Tolerates: Deer

Native to North America: No

Other: Prefers acidic soils; prune immediately after flowering or in early summer to stimulate branching.

Zones: 7 – 9

Location: Blevins Japanese Garden

Camellia-Winters-Star-2020-0600-JA-04

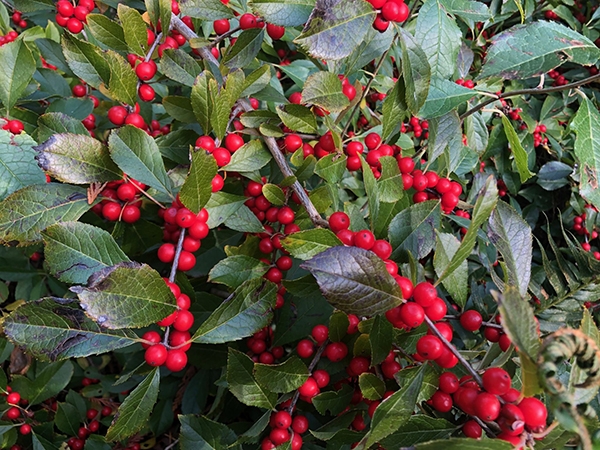
Winterberry (Ilex verticillata)

Bloom Time: June – July

Sun Requirement: Full sun – part shade

Water Requirement: Medium – wet

Wildlife: Birds will eat fruit

Tolerates: Erosion & clay soil

Native to North America: Yes

Other: Though birds do eat the berries, the fruit usually persists throughout winter.

Zones: 3 – 9

Location: Ann & Monroe Carell Jr. Family Sculpture Trail

Ilex-verticillata-10-31-19

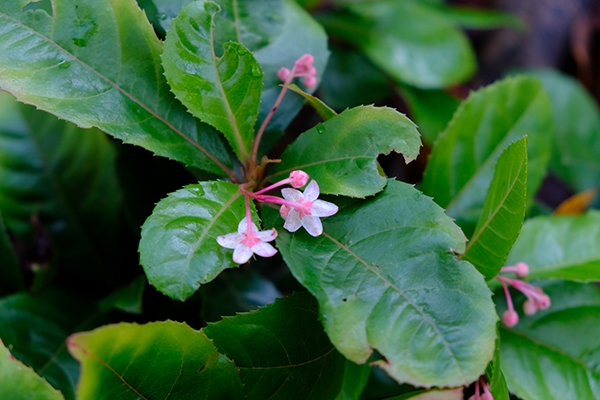
Marlberry (Ardisia japonica)

Bloom Time: July – August

Sun Requirement: Part shade – full shade

Water Requirement: Medium

Tolerates: Heavy Shade

Native to North America: No

Other: Groundcover; used in Chinese medicine for a large number of medical applications including the treatment of bronchitis.

Zones: 7 – 10

Location: Blevins Japanese Garden

Ardisia

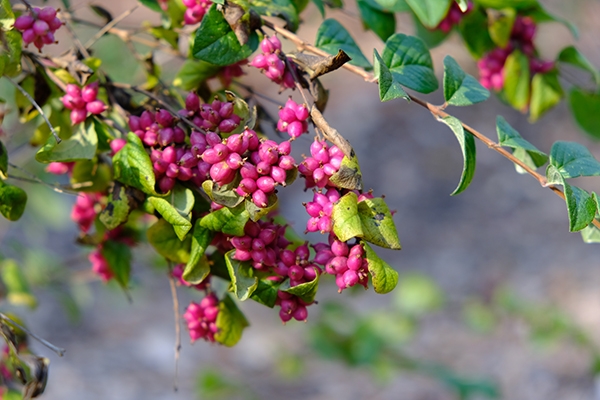
Coralberry (Symphoricarpos orbiculatus)

Bloom Time: June – July

Sun Requirement: Full sun – part shade

Water Requirement: Medium

Wildlife: Birds

Tolerates: Deer, drought, & dry soil

Native to North America: Yes

Other: Excellent winter interest; use stems for floral arrangements.

Zones: 2 – 7

Location: Bracken Foundation Children’s Garden

Symphoricarpos-orbiculatus-2

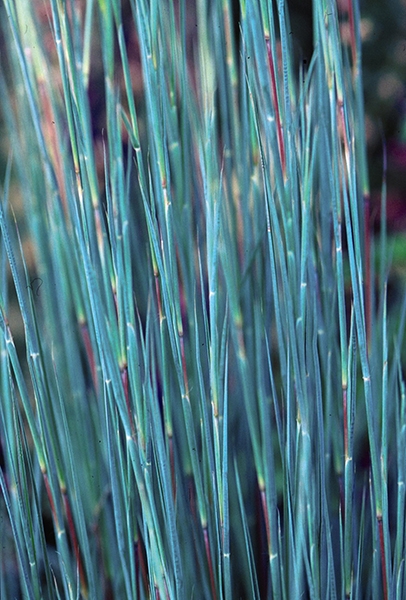
Little Blue Stem (Schizachyrium scoparium ‘The Blues’)

Bloom Time: August – October

Sun Requirement: Full sun

Water Requirement: Dry – Medium

Tolerates: Deer & drought

Native to North America: Yes

Other: Uniquely shaped leaves and stunning fall color!

Zones: 3 – 9

Location: Bradford Robertson Color Garden

Schizochryium.-japonica

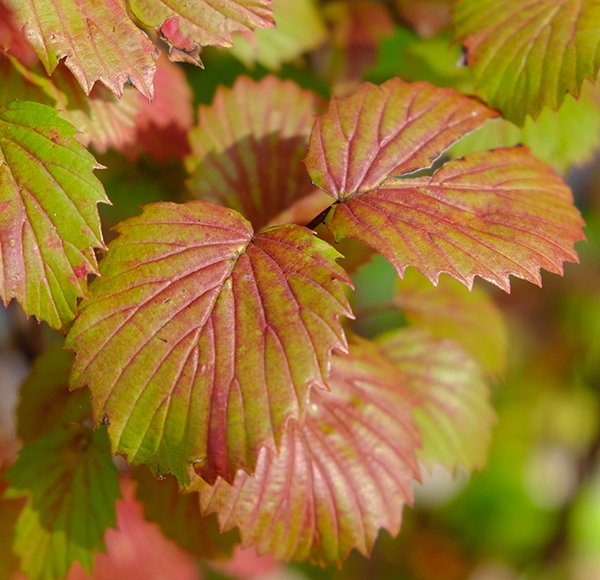
Arrowhead Viburnum (Viburnum dentatum ‘Blue Muffin’)

Bloom Time: June – July

Sun Requirement: Part sun – full sun

Water Requirement: Medium – Dry

Wildlife: Birds & Butterflies

Tolerates: Deer

Native to North America: Yes

Other: Brilliant fall color; berries attract birds

Zones: 3 – 8

Location: Bracken Foundation Children’s Garden

Viburnum-dentatum-Blue-Muffin-2

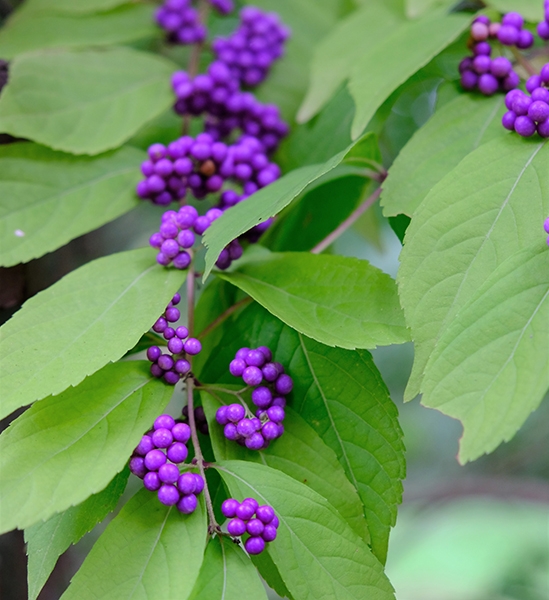
Beautyberry (Callicarpa dichotoma)

Bloom Time: June – August

Sun Requirement: Full sun – part shade

Water Requirement: Medium

Wildlife: Birds

Native to North America: No

Other: Best flowering and fruiting occurs in full sun conditions. The berries are more petite than the American species.

Zones: 5 – 8

Location: Burr Terrace Garden

Callicarpa-dichotoma-BU-Eyebrow-2018-0305-1
test

Sugar Skulls

Sugar Skulls and Belmont University

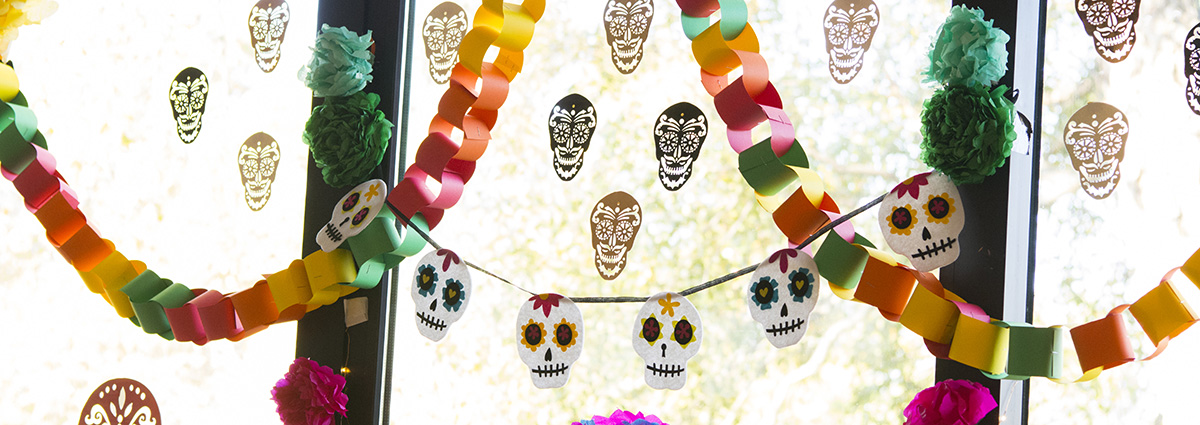
If you’ve visited Cheekwood’s El Día de los Muertos, you’ve undoubtedly seen people carrying around small sugar skulls, and possibly even decorated a few yourself. Sugar skulls, or calaveras de azúcar, are an easily recognizable symbol of the Day of the Dead, and at Cheekwood, there are two stories behind the small items.

The skull has a long tradition in Mesoamerican societies and cultures. While the earliest customs and rituals were lost after the Spanish conquistadors overthrew the Aztec empire in the 1500s, the skull remained central to the celebrations that evolved into the modern Day of the Dead. As an important symbol on any ofrenda, or altar, sugar skulls may have a tiny slip of paper featuring a person’s name on the forehead. It may be the person creating the skull, the one receiving it, or the person being remembered. The skulls are used both as an offering for the departed on an altar and as a sign of affection, with a gentle reminder of mortality, to the living when given as a gift. By sculpting a skull, so closely tied to death, out of sugar, sugar skulls symbolize the bittersweet celebration of remembering those we have lost.

2011-09-16-14.34.00
photo-4

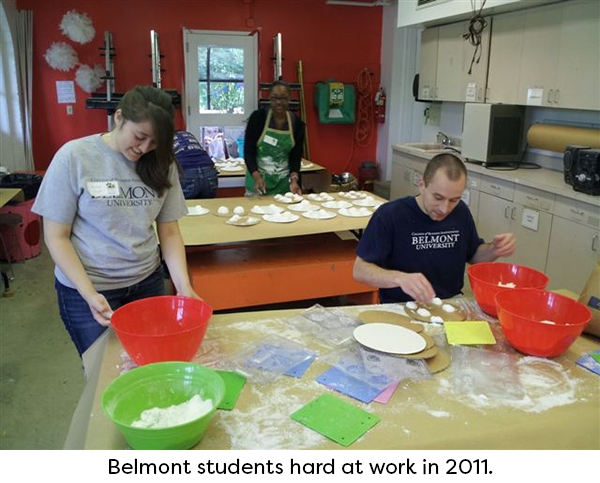
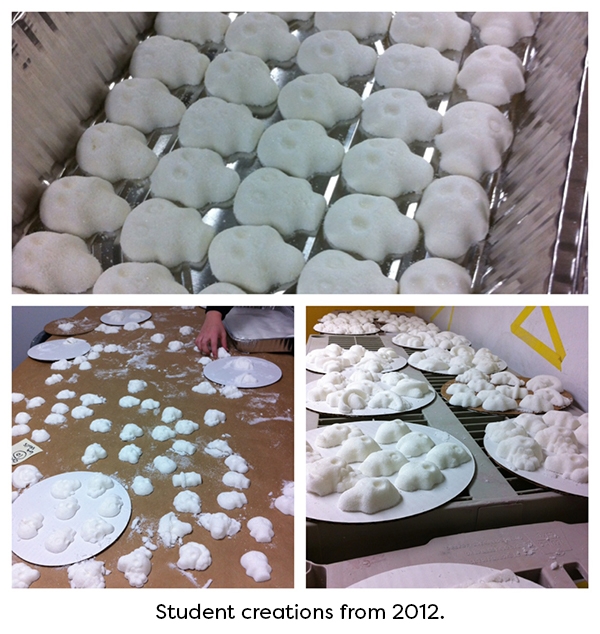
When Cheekwood began celebrating El Día de los Muertos in 2000, a member of the first Advisory Committee was Dr. David Julseth, a Spanish Professor at Belmont University. Professor Julseth, who has always been passionate about involving his students in the Hispanic community through service learning, saw the sugar skulls as a way for students to get hands-on involvement in the growing celebration. Over the years, the tradition has continued and Cheekwood’s El Día de los Muertos wouldn’t be the same without his students. Professor Julseth has his students spend one day, typically the week before the festival, at Cheekwood, where they make hundreds of sugar skulls. Students are given the recipe, the ingredients, the molds, and then they get to work. In 2019, his students made over 1,300 sugar skulls!

Cheekwood is grateful for the support of Professor Julseth, his students, and the rest of the El Dia advisory committee for their hard work in creating such a vibrant celebration each year. Join us online this year and then we hope to welcome everyone back in 2021 with plenty of sugar skulls!

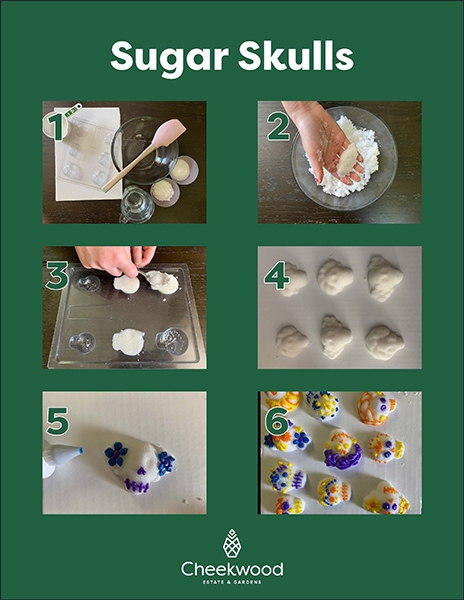
Interested in making your own sugar skulls? Take a look at our step-by-step instructions below!

Make Your Own Sugar Skull

Here’s what you’ll need:

• Sugar

• Meringue powder

• Water

• Mixing bowl

• Mixing spoon

• Measuring utensils

• Sugar Skull molds

• Butter knife

• Cardboard cut to the size of sugar skull mold trays

• Colored icing and tips


Directions:

1. In a mixing bowl, add in your sugar, meringue power and water. For every 1 cup of sugar, add 1 teaspoon of meringue powder and 1 teaspoon of water.

2. Using your hands, combine the ingredients until the mixture holds together when squeezed in your hand. This process will take a few minutes. It should be the consistency of wet sand. If needed you can add a little bit more water, but make sure to mix well and test by squeezing before adding more.

3. Fill up the sugar skull molds by packing the sugar mixture into the individual molds. Use the back of a spoon or your fingertips to pack it tightly. Use a knife to scrape off the excess sugar and then press again with your fingers to smooth the surface.

4. Once all molds are filled, place a piece of cardboard on the back of the sugar skulls. Holding the molds and cardboard together tightly, gently flip it over and place on a table. Lightly tap around the skulls until they release from the mold onto the cardboard. Carefully lift molds away from the sugar skulls.

5. Leave the sugar skulls where they are and set aside to dry for several hours to overnight. They will become solid and easy able to move once dried completely.

6. Once dry, use colorful icing and various icing tips to decorate your sugar skulls. Set aside to dry for a few hours before using as decoration.

Sugar-skulls
Privacy Policy Sitemap Web design by Speak
Back to top